A blank wall can make a room feel unfinished, but decorating it does not have to be expensive or complicated. With a few basic supplies and some creativity, you can make attractive wall decor that reflects your style and fits your space.
These easy DIY ideas work well in living rooms, bedrooms, home offices, entryways, and hallways. Many projects can be completed in an afternoon, while others can be adjusted to suit your available time, materials, and skill level.
1. Create a Gallery Wall
A gallery wall is a simple way to display art, photographs, postcards, or meaningful objects in one organized arrangement. It can be carefully planned or given a more relaxed, collected look.
What you need
– Picture frames in different sizes
– Photos, prints, or children’s artwork
– Measuring tape
– Pencil
– Paper or newspaper
– Removable wall hooks or picture hardware
Start by choosing a color theme. Matching frames create a neat, modern appearance, while mixed frames give the wall more character. Before hanging anything, arrange the frames on the floor to test different layouts.
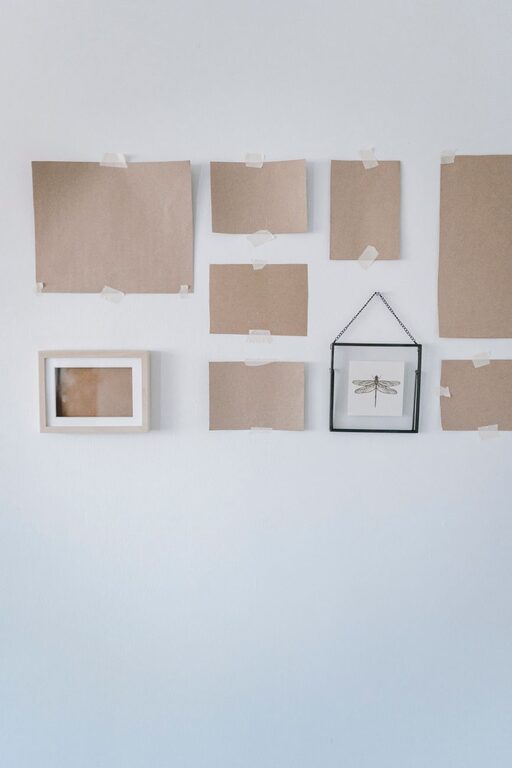
For a precise arrangement, trace each frame onto paper and tape the paper shapes to the wall. This helps you adjust the spacing without creating unnecessary holes. Leave a consistent gap between each piece, usually about two to four inches.
To make the display feel balanced, combine large pieces with smaller ones and mix artwork with personal photos or simple text prints.
2. Make a Fabric Wall Hanging
Fabric wall hangings add warmth, color, and texture without requiring advanced crafting skills. You can use a patterned textile, a scarf, a small rug, or fabric left over from another project.
Simple method
- Choose a piece of fabric that fits the wall and room.
- Cut a wooden dowel slightly wider than the fabric.
- Fold the top edge of the fabric over the dowel.
- Secure the fold with fabric glue, hand stitching, or iron-on tape.
- Tie string or cord to both ends of the dowel.
- Hang it from a wall hook.
For a more artistic look, trim the bottom edge into points or add a row of wooden beads. Neutral fabric works well in calm spaces, while bold patterns can brighten a plain wall.
If you do not want to sew or glue, hang the fabric from clips attached to the dowel. This also makes it easy to change the display throughout the year.
3. Display a Collection of Baskets
Decorative baskets can turn an empty wall into a textured focal point. Flat woven baskets are especially useful because they are lightweight and easy to arrange.
Look for baskets in similar natural colors, or combine different shapes and shades for a more casual style. Arrange them in a loose cluster rather than placing them in a strict grid.
Before hanging the baskets, place them on the floor and take a quick photo. The photo can help you decide whether the arrangement looks balanced. Use suitable hooks or mounting hardware based on the basket’s weight.
This idea works particularly well in dining rooms, bedrooms, and entryways. If you have only a few baskets, place them above a console table or bench to create a smaller display.
4. Turn Shelves Into Wall Decor
Floating shelves are both decorative and useful. They give you a place to display books, small plants, candles, framed art, and favorite objects while adding visual interest to the wall.
Install two or three shelves vertically for a narrow wall, or place them horizontally above a desk or sofa. Keep the display from looking crowded by mixing tall, short, wide, and narrow items.
Styling tips
– Leave some open space between objects.
– Layer small frames in front of larger pieces.
– Use books to add height.
– Include one or two natural elements, such as a plant or wooden object.
– Repeat one color across the shelves for a coordinated look.
Always follow the manufacturer’s instructions when installing shelves, and use wall anchors when needed.
5. Paint a Simple Geometric Design
You do not need to paint an entire room to create a dramatic change. A simple geometric design on one wall can act as a large piece of custom artwork.
Choose two or three colors that work with your existing furniture. Shapes such as arches, half circles, blocks, and soft diagonal lines are easy to create with painter’s tape and a small roller or brush.
For curved shapes, make a paper template or use a pencil tied to a piece of string as a simple compass. Mark the curve lightly before painting.
Use painter’s tape for straight edges, pressing it down firmly before applying paint. Remove the tape while the paint is still slightly wet to help create clean lines. If you are renting, consider using removable wall decals or large sheets of temporary wallpaper instead.
6. Make a Photo Clothesline
A photo clothesline is an affordable way to display memories without using multiple frames. It works well in bedrooms, offices, and family spaces.
Attach a length of twine, wire, or ribbon to two wall hooks. Use small clips to hang photographs, postcards, notes, or children’s drawings. For a layered look, install two or three lines at different heights.
You can refresh the display whenever you like, making this project easy to update for holidays, travel memories, or seasonal artwork. Choose matching clips for a polished appearance, or use colorful clips for a playful style.
Keep the arrangement neat by leaving similar spaces between the photos. You can also add a small letter board or printed quote as a central feature.
7. Frame Natural Elements
Leaves, flowers, grasses, and small branches can become simple wall art. Pressed plants have a light, natural appearance and work well with many decorating styles.
To make pressed botanical art, place leaves or flowers between sheets of paper inside a heavy book. Leave them for one to two weeks, checking occasionally. Once dry, arrange them in a frame with a plain background.
You can use one large frame for a clean look or create a set of smaller frames. White, cream, and soft green backgrounds keep the display understated, while dark backgrounds make pale plants stand out.
Make sure the plants are completely dry before framing them. Avoid placing natural materials in areas with high humidity or direct sunlight, as these conditions may cause fading or damage.
8. Build a Corkboard or Memo Wall
A corkboard is practical wall decor for kitchens, offices, and entryways. Instead of using a plain square board, customize one to match your room.
Cover a corkboard with fabric using spray adhesive or staples on the back. Add a wood frame, paint the edges, or arrange several boards in a larger pattern. You can also cut cork tiles into circles, arches, or other shapes before attaching them to the wall.
Use the board for reminders, recipes, inspiring images, shopping lists, or notes. To keep it attractive, remove old papers regularly and leave a little open space between items.
Tips for a Successful DIY Wall Project
Before starting, measure the wall and consider the furniture nearby. Decor should support the room rather than make it feel crowded.
Keep these tips in mind:
– Test colors and layouts before committing.
– Use removable hooks for lightweight displays.
– Choose hardware that can support the item’s weight.
– Hang artwork at a comfortable viewing height.
– Leave enough space around each piece.
– Repeat colors, materials, or shapes to create unity.
– Protect delicate items from direct sunlight and moisture.
The best wall decor does not need to look perfect. A handmade display can bring personality and warmth to your home, especially when it includes colors, textures, and objects you genuinely enjoy. Start with one small project, then build your wall decor collection over time.
About the Author